
Disclaimer: THIS METHOD WAS PATCHED AS OF 11/13/23. THE VULNERABILITIES WERE UPDATED SO IT THEY COULD NO LONGER BE EXPLOITED. I DISCOVERED A NEW VULERABILITY AND I WILL POST AN UPDATED VERSION SOON.
Step 1. Download Burp Suite Community Edition
Go to THIS link, choose Burp Suite Community Edition as the version, and Windows or whatever operating system you’re using as the OS. Then, click download. Run the executable and go through Burp Suite’s installation process. Basically, just spam the next button and then click finish when you get to the end.
Step 2. Launch Burp Suite
Once you launch Burp Suite, you should get a window that looks like this:
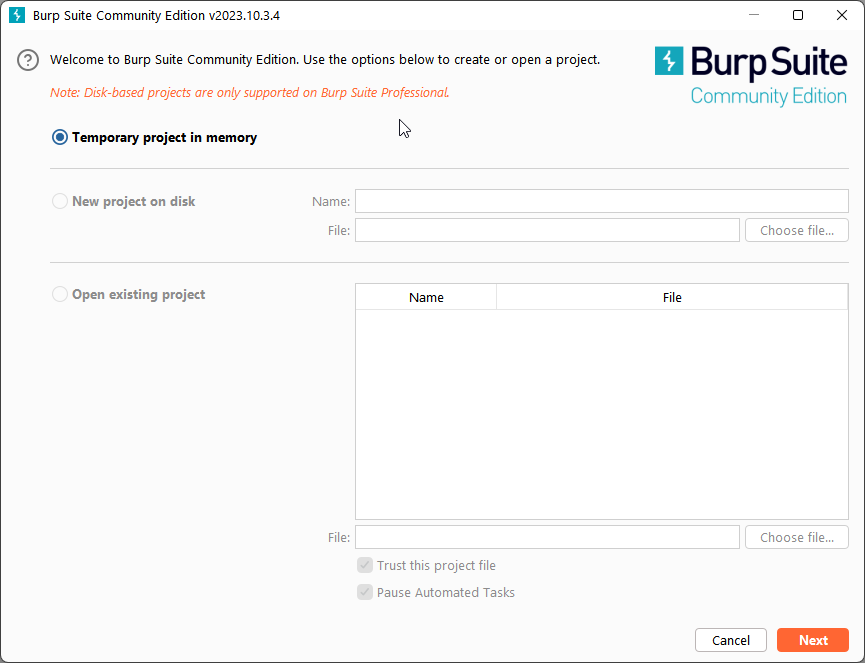
We don’t care about that. Just hit next. Then another window will pop up. It will look like this:
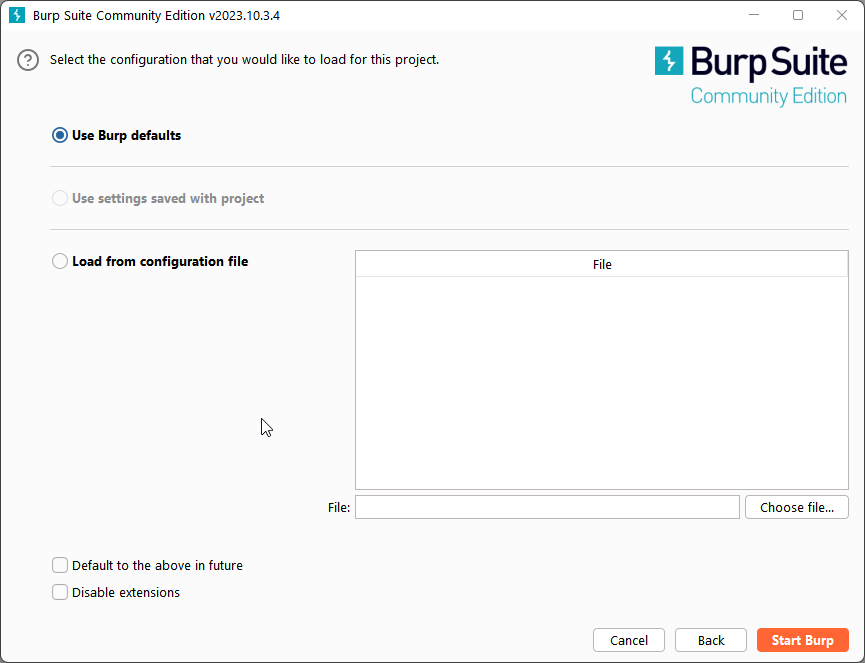
We don’t care about this either. Click the Start Burp button. A bigger window will open that looks like this:
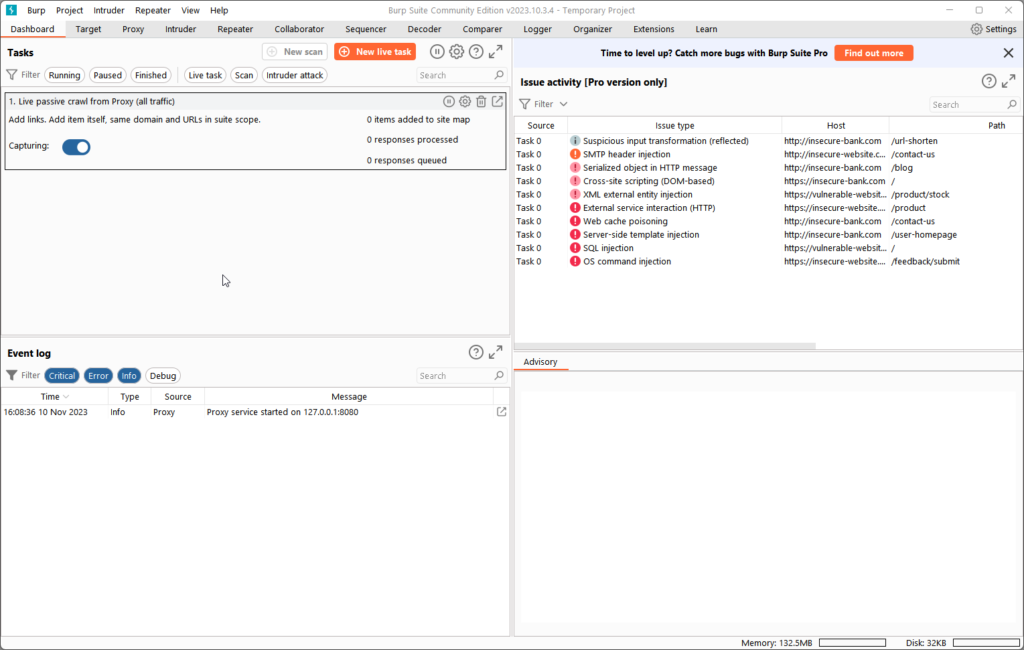
For now, just minimize the window. We’ll use it later.
Step 3. Configuring Proxy
Now we have to configure our proxy so we can intercept HTTP traffic with Burp Suite. First, open your computers proxy settings. To do this, just type “proxy” in the windows search bar. Something like this should pop up:

Click on that. The windows settings app should open up. It will look like this (or maybe not if you’re on windows 10):
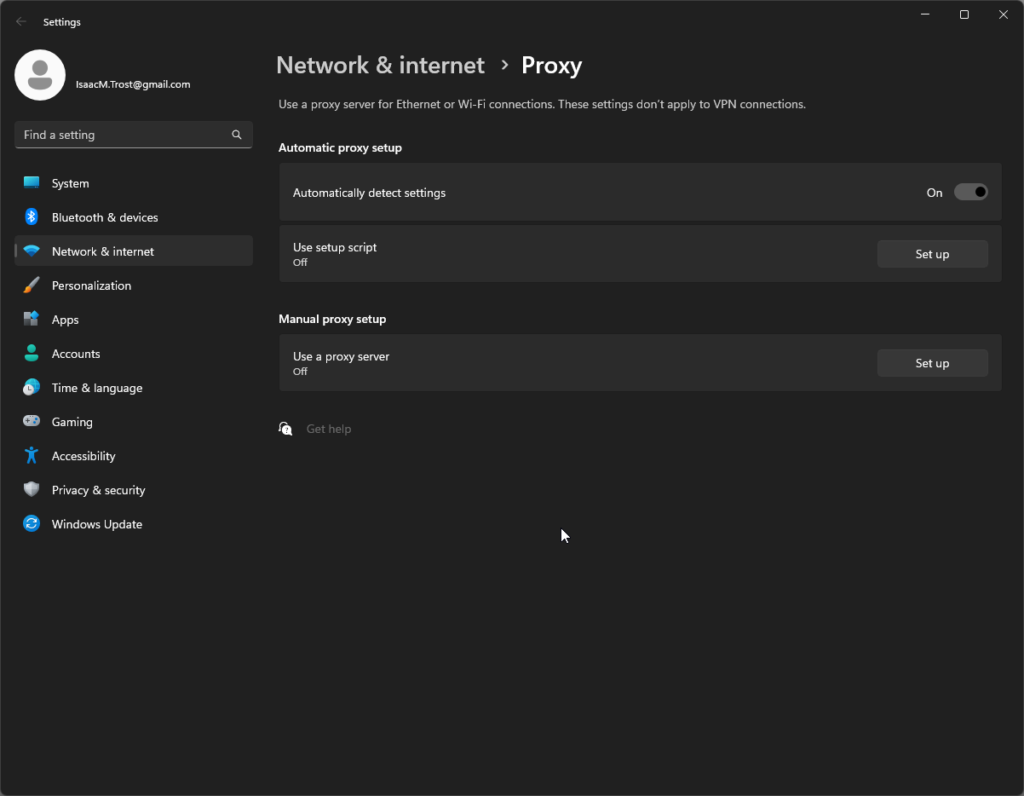
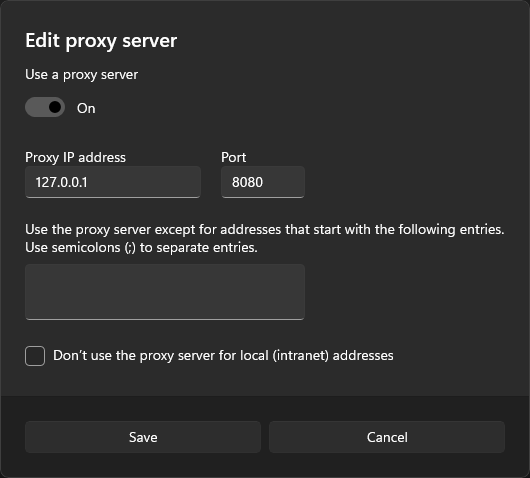
Under manual proxy setup, go to the “Use a proxy server” setting and click the “Set up” button. An “Edit proxy server” window should pop up. Copy all of the settings in this screenshot and click save:
You now have your proxy configured for using Burp. Be aware that if Burp is not open and you have the proxy server enabled, you probably wont be able to access the internet because the proxy routes all internet traffic through Burp Suite so it can be intercepted. If Burp isn’t open, there’s nowhere for the traffic to go.
Step 4. Installing CA Certificate
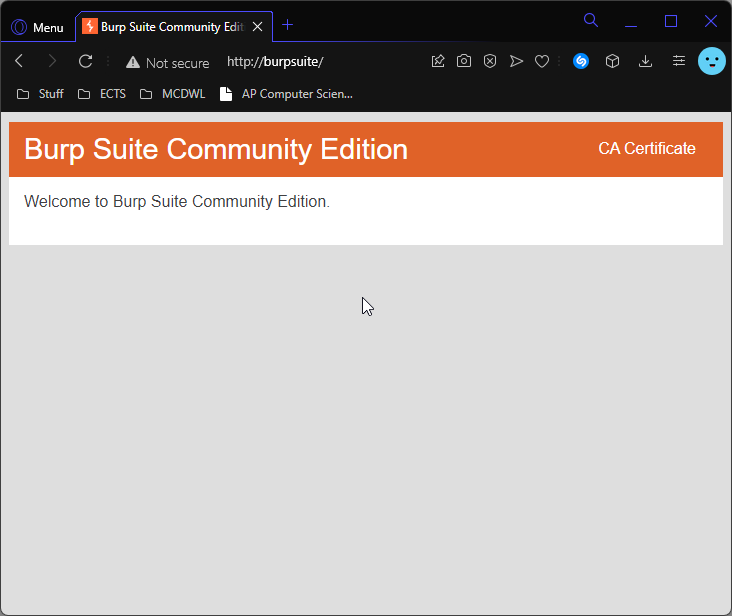
Now that we have the proxy set up, we have to install Burp Suite’s CA Certificate. I don’t really know what the heck that is, but I do know it is required to intercept traffic (intercept might work without this certificate but I haven’t tested. I think it’s just required for intercepting stuff from browsers other than the Burp browser but who knows. We’ll just install it anyways). Now, in your browser, go the the address http://burpsuite/. The site should look like this:
If you couldn’t load the site, it is probably because you don’t have the proxy enabled and/or Burp open.
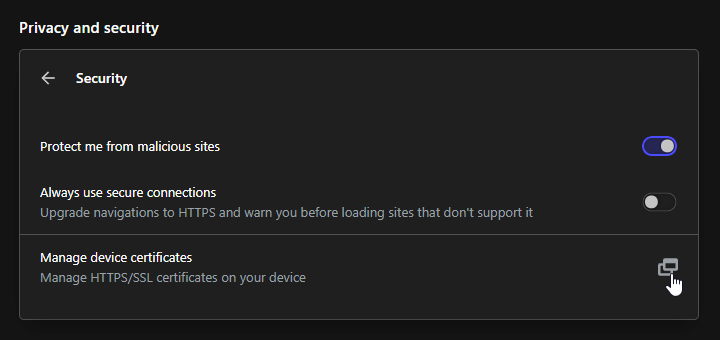
Once the site is loaded, click the CA Certificate button in the top right. This will download a certificate file called cacert.der. Remember where it gets saved. What we need to do now is import this certificate into our browser. So open your browser of choice and go to settings. Under Privacy & Security, there SHOULD be an option called “Manage device certificates”. Here’s what the setting looks like in OperaGX:
Click that button. I don’t feel like typing out all the instructions on what to do so just follow this quick video tutorial:
Also, if it wasn’t clear, you are selecting the certificate you should have downloaded earlier (the cacert.der file).
If you did everything correctly so far, you should have Burp Suite set up now.
Step 5. HACKING!!!!!!!!
Now its time to get to the cool part, actually hacking 1v1.LOL.
This part is very complicated, so I just made another video because I do not want to type it out lol. Here you go:
After you’re done with Burp Suite, you can close the program but remember to also turn off the proxy that we set earlier in windows settings 👍.
Happy hacking!


Also, whoever completes the challenge at the end of the second video first gets 5 dollars.
Message me in teams if you do it 👍